Getting started with React InstantSearch
This is the React InstantSearch v7 documentation. React InstantSearch v7 is the latest version of React InstantSearch and the stable version of React InstantSearch Hooks.
If you were using React InstantSearch v6, you can upgrade to v7.
If you were using React InstantSearch Hooks, you can still use the React InstantSearch v7 documentation, but you should check the upgrade guide for necessary changes.
If you want to keep using React InstantSearch v6, you can find the archived documentation.
On this page
React InstantSearch is a React library that lets you create an instant search results experience using Algolia’s search API.
This guide covers how to integrate InstantSearch in your React application:
- Adding a search box to send textual queries
- Displaying and highlighting hits
- Filtering to narrow down the results set
- Paginating results to navigate
- Applying search parameters
Before you start
This guide assumes React knowledge and an existing app using React ≥ 16.8.0. If you don’t already have a running React app, you can start with this CodeSandbox React template.
Then, install algoliasearch and react-instantsearch following the installation guide.
Add InstantSearch to your app
The root component to start using React InstantSearch is the <InstantSearch> provider. This component connects your InstantSearch app to your Algolia application. It accepts a search client and the index to search into.
1
2
3
4
5
6
7
8
9
10
11
12
import algoliasearch from 'algoliasearch/lite';
import { InstantSearch } from 'react-instantsearch';

const searchClient = algoliasearch('YourApplicationID', 'YourSearchOnlyAPIKey');

function App() {
  return (
    <InstantSearch searchClient={searchClient} indexName="instant_search">
      {/* ... */}
    </InstantSearch>
  );
}
You can use any Hook and widget in <InstantSearch>.
Add a search box
The main UI component of a search experience is a search box. It’s usually your users’ entry point to discover the content of the app.
React InstantSearch provides a <SearchBox> widget to display a search box connected to Algolia.
1
2
3
4
5
6
7
8
9
10
11
12
import algoliasearch from 'algoliasearch/lite';
import { InstantSearch, SearchBox } from 'react-instantsearch';

const searchClient = algoliasearch('YourApplicationID', 'YourSearchOnlyAPIKey');

function App() {
  return (
    <InstantSearch searchClient={searchClient} indexName="instant_search">
      <SearchBox />
    </InstantSearch>
  );
}
If you try typing in the search box, you won’t see any hits on the page yet. However, the component is connected to Algolia and is already sending queries: if you open the Network tabs in your browser’s developer tools, you can see network requests going out on every keystroke. InstantSearch adds the input value in the “query” uiState, which is then converted to search parameters and sent to Algolia.

Network tab for the query “iphone”
You’ve got results coming from Algolia, you now need to display them.
Display hits
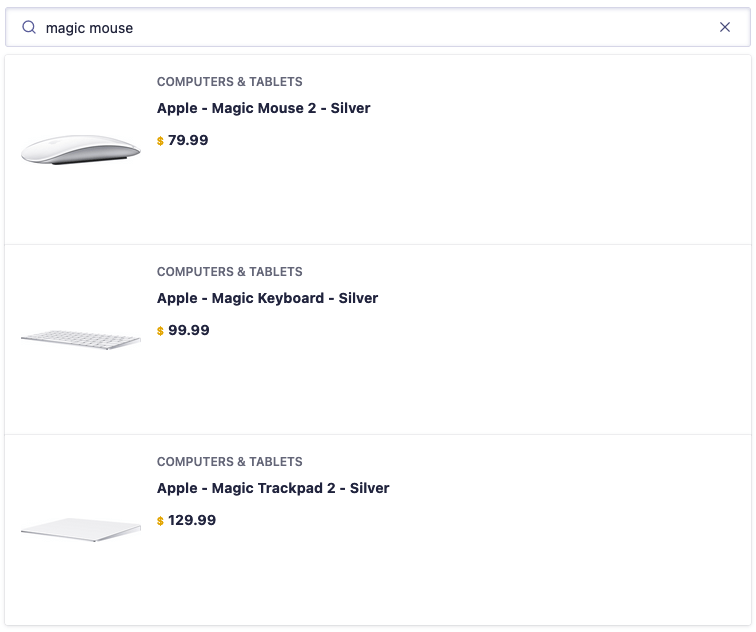
When Algolia returns new results, you want to list them in the UI. You can use the <Hits> widget.
1
2
3
4
5
6
7
8
9
10
11
12
13
14
15
16
17
18
19
20
21
22
23
24
import algoliasearch from 'algoliasearch/lite';
import { InstantSearch, SearchBox, Hits } from 'react-instantsearch';

const searchClient = algoliasearch('YourApplicationID', 'YourSearchOnlyAPIKey');

function Hit({ hit }) {
  return (
    <article>
      <img src={hit.image} alt={hit.name} />
      <p>{hit.categories[0]}</p>
      <h1>{hit.name}</h1>
      <p>${hit.price}</p>
    </article>
  );
}

function App() {
  return (
    <InstantSearch searchClient={searchClient} indexName="instant_search">
      <SearchBox />
      <Hits hitComponent={Hit} />
    </InstantSearch>
  );
}
Now, hits update whenever you type a character in the search box.

Hits without highlighting
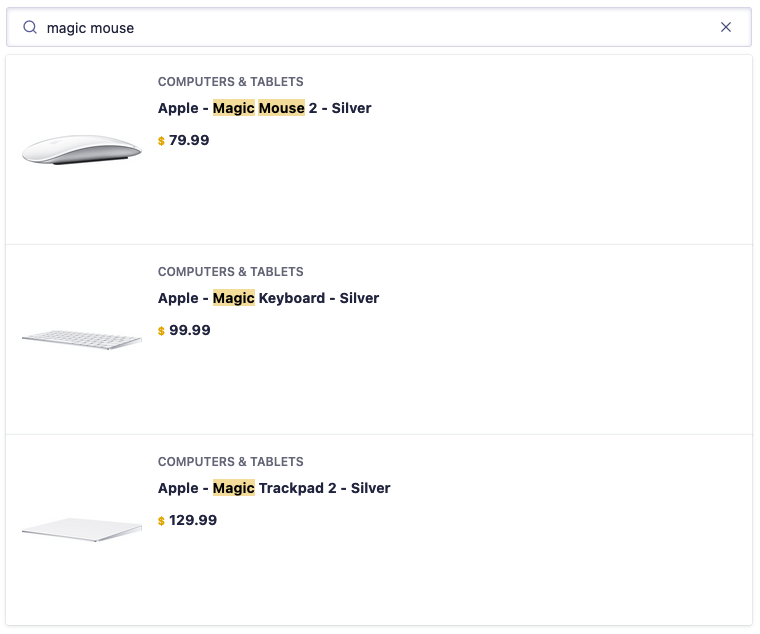
You may notice that it’s hard to understand why a hit is ranked higher than others. To improve this experience, you can highlight the parts of a result that matched the query.
Highlight matches
Algolia supports highlighting and returns the highlighted parts of a hit in the response. You can use the <Highlight> widget to highlight matches in each attribute.
1
2
3
4
5
6
7
8
9
10
11
12
13
14
15
16
17
18
19
20
21
22
23
24
25
26
27
28
29
30
31
import algoliasearch from 'algoliasearch/lite';
import {
  InstantSearch,
  SearchBox,
  Hits,
  Highlight,
} from 'react-instantsearch';

const searchClient = algoliasearch('YourApplicationID', 'YourSearchOnlyAPIKey');

function Hit({ hit }) {
  return (
    <article>
      <img src={hit.image} alt={hit.name} />
      <p>{hit.categories[0]}</p>
      <h1>
        <Highlight attribute="name" hit={hit} />
      </h1>
      <p>${hit.price}</p>
    </article>
  );
}

function App() {
  return (
    <InstantSearch searchClient={searchClient} indexName="instant_search">
      <SearchBox />
      <Hits hitComponent={Hit} />
    </InstantSearch>
  );
}
Now you can better understand why a hit ranks higher than others.

Hits with highlighting
Sending click and conversion events
To send click and conversion events when users interact with your search UI, set the insights option to true.
1
2
3
4
5
6
7
8
9
10
11
12
13
14
15
16
17
18
19
20
21
22
23
24
25
26
27
28
29
30
31
import algoliasearch from 'algoliasearch/lite';
import {
  InstantSearch,
  SearchBox,
  Hits,
  Highlight,
} from 'react-instantsearch';

const searchClient = algoliasearch('YourApplicationID', 'YourSearchOnlyAPIKey');

function Hit({ hit }) {
  return (
    <article>
      <img src={hit.image} alt={hit.name} />
      <p>{hit.categories[0]}</p>
      <h1>
        <Highlight attribute="name" hit={hit} />
      </h1>
      <p>${hit.price}</p>
    </article>
  );
}

function App() {
  return (
    <InstantSearch searchClient={searchClient} indexName="instant_search" insights>
      <SearchBox />
      <Hits hitComponent={Hit} />
    </InstantSearch>
  );
}
Filter with a refinement list
A search box is a great way to refine a search experience, but sometimes you need to narrow down the results to find what you’re looking for in a specific category. You can use <RefinementList> to filter items based on their brand, size, color, etc.
1
2
3
4
5
6
7
8
9
10
11
12
13
14
15
16
17
18
19
20
21
22
import algoliasearch from 'algoliasearch/lite';
import {
  InstantSearch,
  SearchBox,
  Hits,
  Highlight,
  RefinementList,
} from 'react-instantsearch';

const searchClient = algoliasearch('YourApplicationID', 'YourSearchOnlyAPIKey');

// ...

function App() {
  return (
    <InstantSearch searchClient={searchClient} indexName="instant_search" insights>
      <SearchBox />
      <RefinementList attribute="brand" />
      <Hits hitComponent={Hit} />
    </InstantSearch>
  );
}
Refinement lists let you refine on multiple values. React InstantSearch provides more refinement widgets with specialized behaviors:
<Menu>to refine on a single value per attribute<HierarchicalMenu>to filter down a hierarchy of categories<ToggleRefinement>to filter on and off on a given attribute value
Once you start adding multiple refinement UI widgets, you can use <CurrentRefinements> to display all the active filters and let users remove them individually.
Paginate your results
There are only 20 hits showing in the application, but Algolia returns more results.

Network tab showing the number of hits and the number of pages
You can use the <Pagination> widget to navigate through all the pages.
1
2
3
4
5
6
7
8
9
10
11
12
13
14
15
16
17
18
19
20
21
22
import algoliasearch from 'algoliasearch/lite';
import {
  InstantSearch,
  SearchBox,
  Hits,
  Highlight,
  RefinementList,
  Pagination,
} from 'react-instantsearch';

// ...

function App() {
  return (
    <InstantSearch searchClient={searchClient} indexName="instant_search" insights>
      <SearchBox />
      <RefinementList attribute="brand" />
      <Hits hitComponent={Hit} />
      <Pagination />
    </InstantSearch>
  );
}
Configure search parameters
Algolia returns 20 hits by default, but you can override any search parameters with <Configure>. This widget doesn’t render anything, but still instructs InstantSearch to send custom search parameters to Algolia.
You can render the <Configure> widget in your app, specifying 40 hits per page.
1
2
3
4
5
6
7
8
9
10
11
12
13
14
15
16
17
18
19
20
21
22
23
24
import algoliasearch from 'algoliasearch/lite';
import {
  InstantSearch,
  SearchBox,
  Hits,
  Highlight,
  RefinementList,
  Pagination,
  Configure,
} from 'react-instantsearch';

// ...

function App() {
  return (
    <InstantSearch searchClient={searchClient} indexName="instant_search" insights>
      <Configure hitsPerPage={40} />
      <SearchBox />
      <RefinementList attribute="brand" />
      <Hits hitComponent={Hit} />
      <Pagination />
    </InstantSearch>
  );
}
You can pass any search parameters to <Configure>, even reactive props coming from the React state but you shouldn’t overuse <Configure>. If you need to set a search parameter after a user interaction, you may want to use a refinement widget.
Next steps
You now have a good starting point to create an even more dynamic experience with React InstantSearch. Next up, you could improve this app by:
- Loading hits without pagination using
<InfiniteHits>. - Searching in multiple indices with
<Index>. - Checking the API reference to discover more widgets and Hooks.
- Server-side rendering your application for increased performance.
